
There’s just something special about a handmade welcome sign on your front door—it instantly adds warmth, personality, and a little “you” to your home. And with a laser cutter? You can create stunning, high-end signs that look boutique-worthy without the boutique price.
Today I’m showing you how to create your own seasonal and interchangeable welcome signs using three beautiful design files from Atomm:
- Seasonal Signs File: https://www.atomm.com/project/73057-laser-cut-seasonal-signs
- Floral Welcome Sign File: https://www.atomm.com/project/67740-laser-cut-wooden-welcome-sign-with-floral-design
- Interchangeable Seasonal Signs: https://www.atomm.com/project/111847-seasonal-interchangeable-signs (this file includes the little icons that go below each season)
Whether you want a classic everyday look or a sign you can switch out for every holiday, this project has you covered.
Why You’ll Love This Project
- One sign can last all year with interchangeable pieces
- Easy to personalize with your favorite colors
- Perfect for front doors, porches, or entryways
- Great for gifts
Materials You’ll Need
- Basswood (1/4″ for base and 1/8” for layering)
- Laser cutter (I used my xTool M1 Ultra)
- Wood glue or I have also used this spray adhesive (it is less messy)
- Craft paint (variety of colors), gel stain (gel stain is less messy), or sealant (optional for finishing)
- Paint brushes (these are sponge brushes, but I really like them. They are reusable and easy to clean)
- Twine, ribbon, or wire for hanging
- Small Carabiner Clips
- Clamps (optional but helpful)
- Sandpaper (optional for smooth edges)
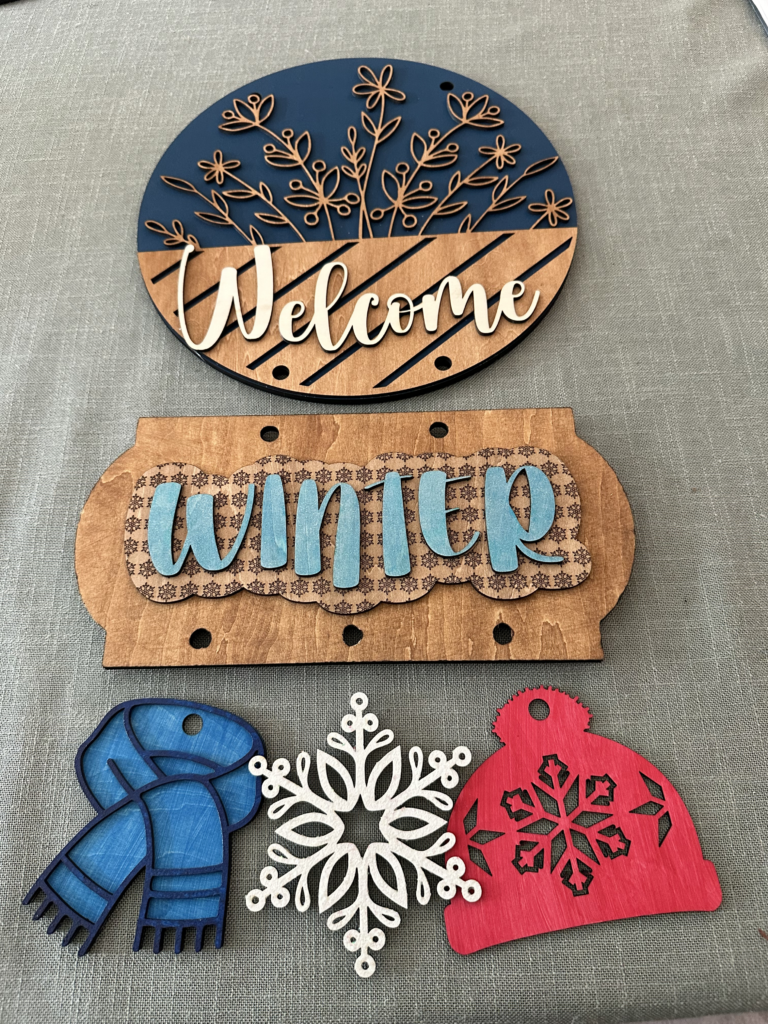
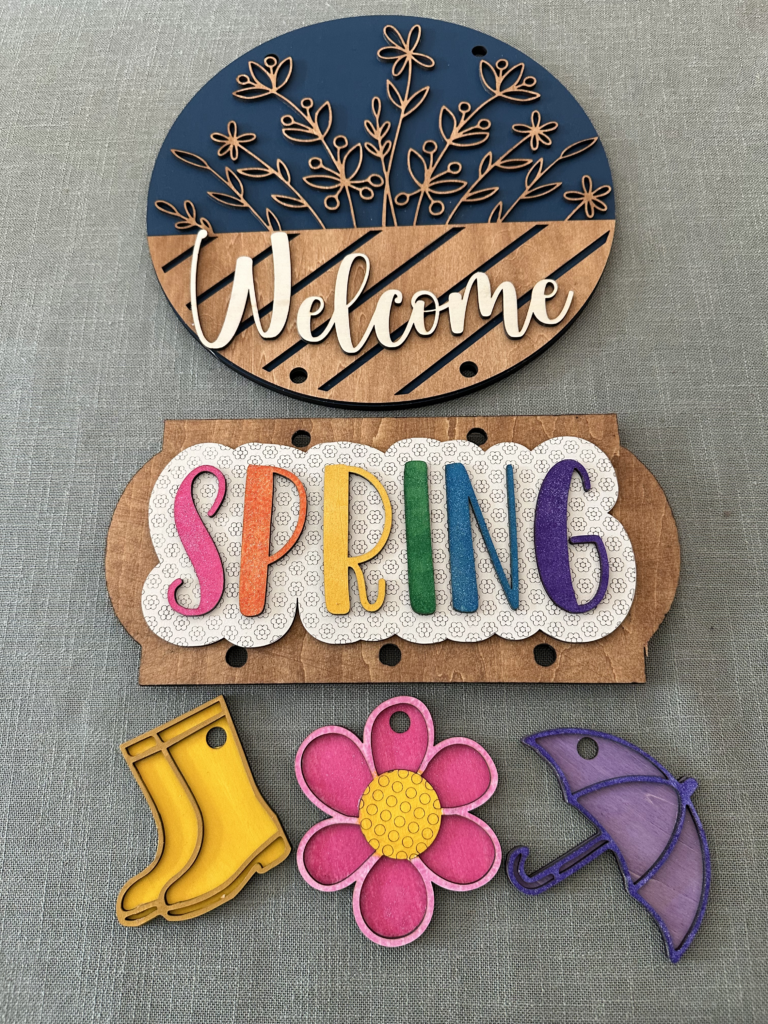
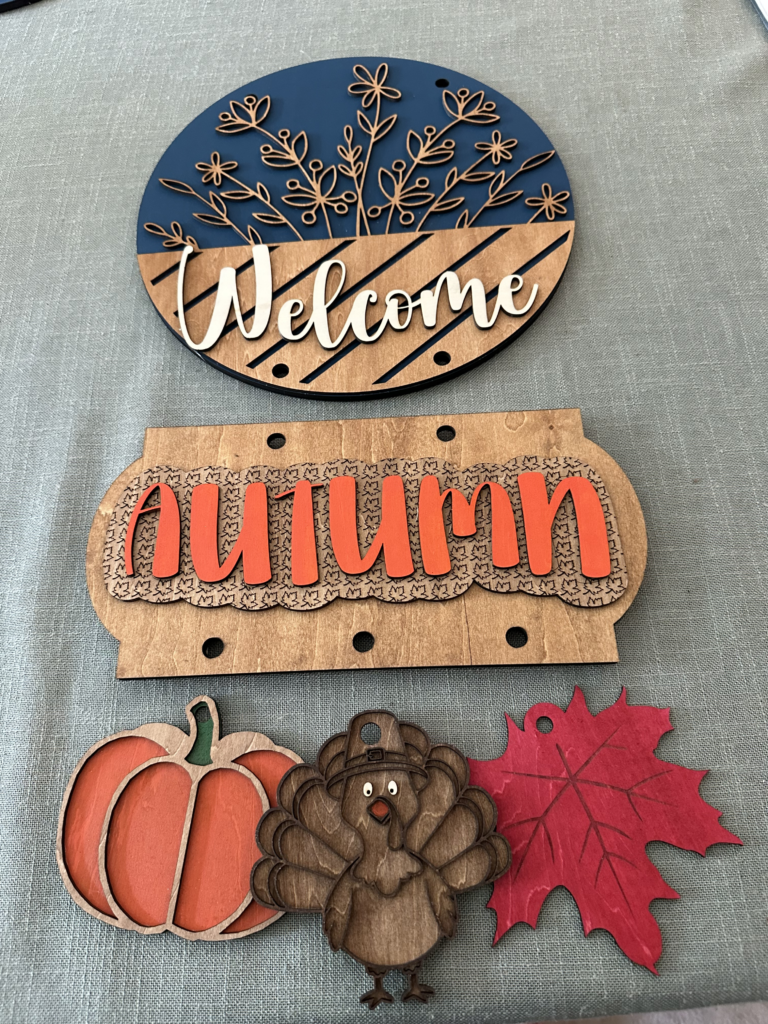
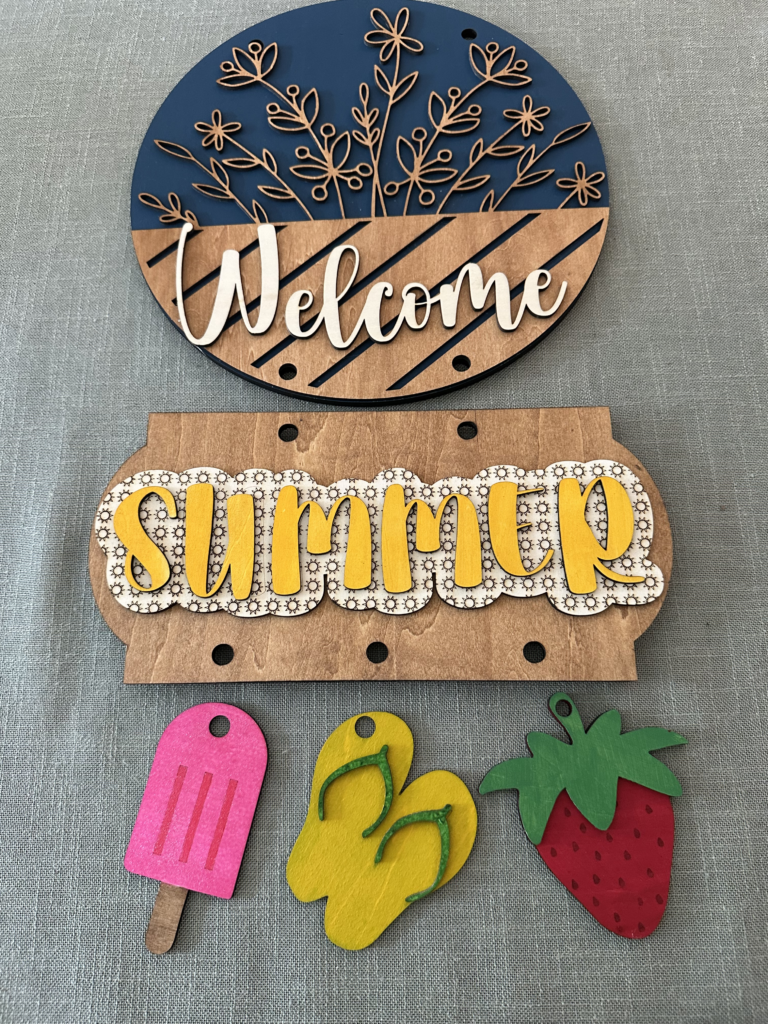
Here is the final product after using the Small Carabiner Clips to attach the pieces together.
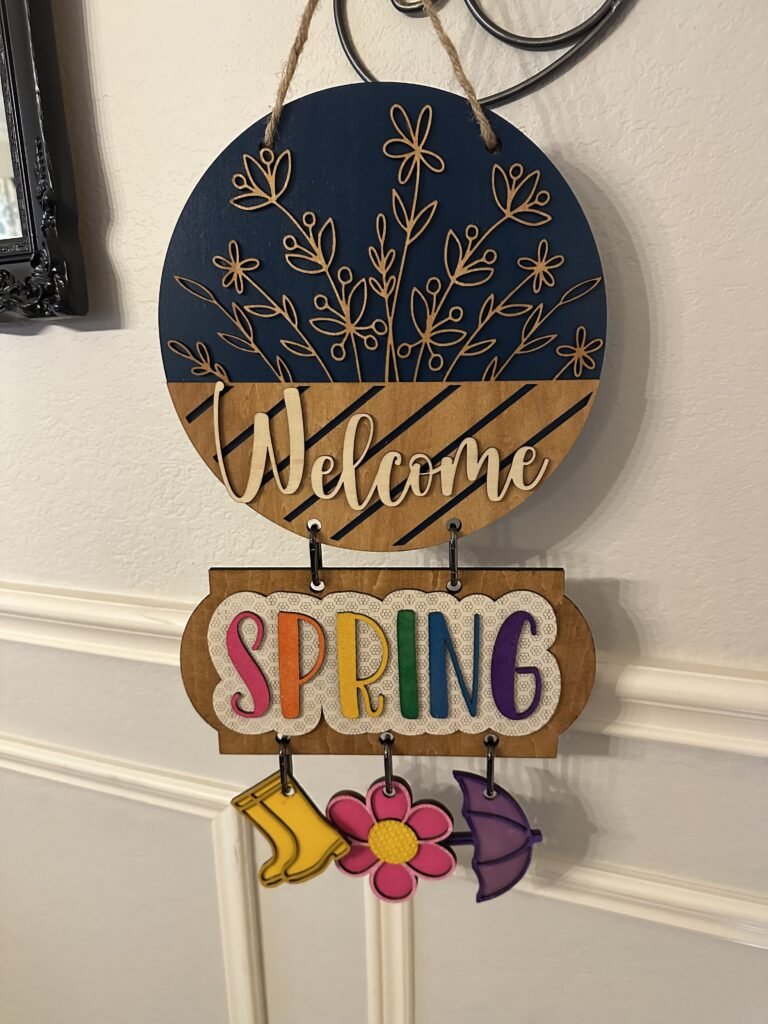
Step 1: Choose Your Style
You’ve got options, choose your main sign. In this example I chose the Classic Floral sign, but any sign will do. Then I used the Seasonal Signs and added an interchangeable icons to add to each season.
If you love decorating for every season (same 🙋♀️), the interchangeable file is a game changer.
Step 2: Prep Your Wood
Place your basswood into your laser cutter and make sure it’s flat and secure. Upload your chosen file into your laser software and adjust settings based on your machine. Double check all of the appropriate settings for engravings, scoring and cutting are set for each item.
Step 3: Cut Your Design
Once your settings are dialed in, start your cut. Watching it come together never gets old 😍
You’ll end up with:
- A base sign (round or shaped depending on file)
- Lettering (like “Welcome”)
- Decorative or seasonal elements
Carefully remove all pieces from the honeycomb bed.
Step 4: Paint & Customize
This is where your creativity shines!
A few ideas:
- Neutral farmhouse (white, black, greenery tones)
- Bright seasonal colors (orange for fall, red/green for Christmas, pastels for spring)
- Rustic wood stain with painted accents
Pro Tip:
Paint your pieces before gluing—it’s much easier and cleaner.
Let everything dry completely before assembling.
Step 5: Assemble Your Sign
- Glue your layers onto the appropriate base.
- Attach decorative elements using the carabiners and rings.
This makes it super easy to swap designs in seconds!
Step 6: Add a Hanger
Attach twine, ribbon, or wire to the back of your sign.
You can also:
- Add a bow for extra charm
- Layer ribbon styles for a fuller look
- Match your hanger to the season
Step 7: Seal (Optional but Recommended)
If your sign will be outdoors, apply a clear protective sealer to help it last through weather and sun exposure.
Creative Ideas for Your Sign
- Create one base and a full set of seasonal attachments
- Make personalized gifts for friends or neighbors
- Sell sets with multiple interchangeable pieces
- Match your sign to your holiday porch décor
Final Thoughts
These laser-cut welcome signs are one of those projects that look impressive but are surprisingly simple to make. And with interchangeable options, you’re not just making one sign—you’re creating a décor system you can use all year long.
If you give this project a try, I’d love to see how you style yours! 💛