
If you’re anything like me, you probably have a drawer (or three 😅) filled with loose decks of playing cards—some missing boxes, some bent, and all just a little too chaotic. So I decided to create a simple, beautiful solution: a laser-cut playing card storage box that keeps everything neat, protected, and easy to grab for game night.
This project is beginner-friendly, functional, and makes a great handmade gift too!
✨ Why You’ll Love This Project
There’s something so satisfying about combining creativity with organization. This box is:
- Perfectly sized for standard playing cards
- Durable and long-lasting
- Easy to customize with paint or stain
- A great beginner laser project
- Ideal for gifts, game nights, or travel
🪵 Materials You’ll Need
Before getting started, gather your supplies:
- Basswood (1/8” works great for layering)
- Laser cutter (I used my xTool M1 Ultra)
- Wood glue or I have also used this spray adhesive (it is less messy)
- Craft paint (variety of colors), gel stain (gel stain is less messy), or sealant (optional for finishing)
- Paint brushes (these are sponge brushes, but I really like them. They are reusable and easy to clean)
- Clamps (optional but helpful)
- Sandpaper (optional for smooth edges)
- Gard Game set (if you are looking to give these as a gift that include the games)
✂️ Get the File
You can download the exact file I used here:
👉 https://www.atomm.com/project/111559-box-for-playing-cards
This file is designed to fit together easily, making assembly smooth—even if you’re newer to laser cutting.
🔥 Step-by-Step Instructions
1. Upload & Prep Your File
Upload the design into your laser software and adjust settings based on your material. Make sure the objects in the file that need to be engraved are set to engrave and the objects that need to be cut are set to cut. Notice outside the canvas area, I do have other card game titles if you want to engrave these on the box. This is optional and you may have to replace the font with the fonts you have on your computer. Please note, there is a 2nd canvas for the leather straps. Your xTool M1 Ultra rotary blade works well for this. If you do not have the M1 Ultra, you can always create a wooden pattern, then cut your faux leather. Make sure your cuts are clean and your settings match your wood thickness.
2. Cut Your Pieces
Place your basswood into your laser cutter and run the project. Watch as all the pieces come together—this is always my favorite part!
3. Sand the Edges
Lightly sand each piece to remove any burn marks or rough edges. This step makes a big difference in your final finish, but it is completely optional. I don’t always sand my edges.
4. Assemble the Box
Begin assembling the box. Once the box is assembled, I clamp the front section and back section. Then I dab glue in each corner seam and the seam on the bottom to give it extra reinforcement.
VIDEO COMING SOON
5. Finish (Optional but Fun!)
This is where you can really make it your own:
- Paint it for a pop of color
- Stain it for a rustic look
- Add vinyl, engraving, or personalization
💡 Creative Ideas
Want to take it up a notch? Try:
- Adding a name or monogram for a gift
- Creating themed boxes (family game night, travel set, etc.)
- Bundling with a deck of cards for a cute present
❤️ Final Thoughts
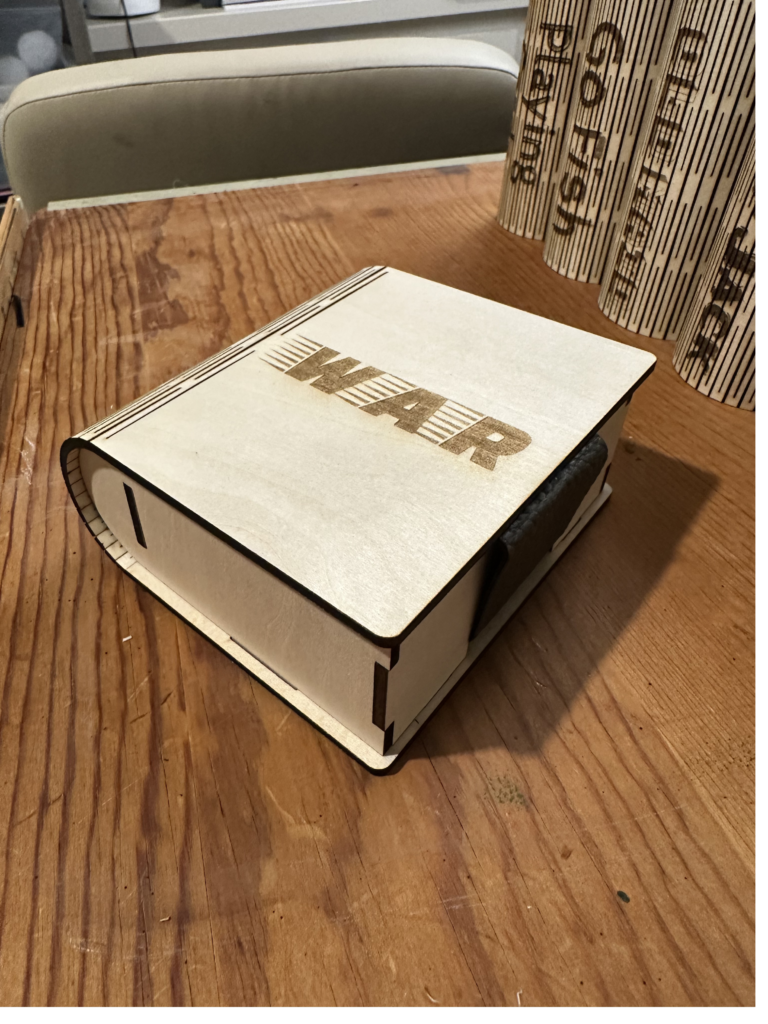
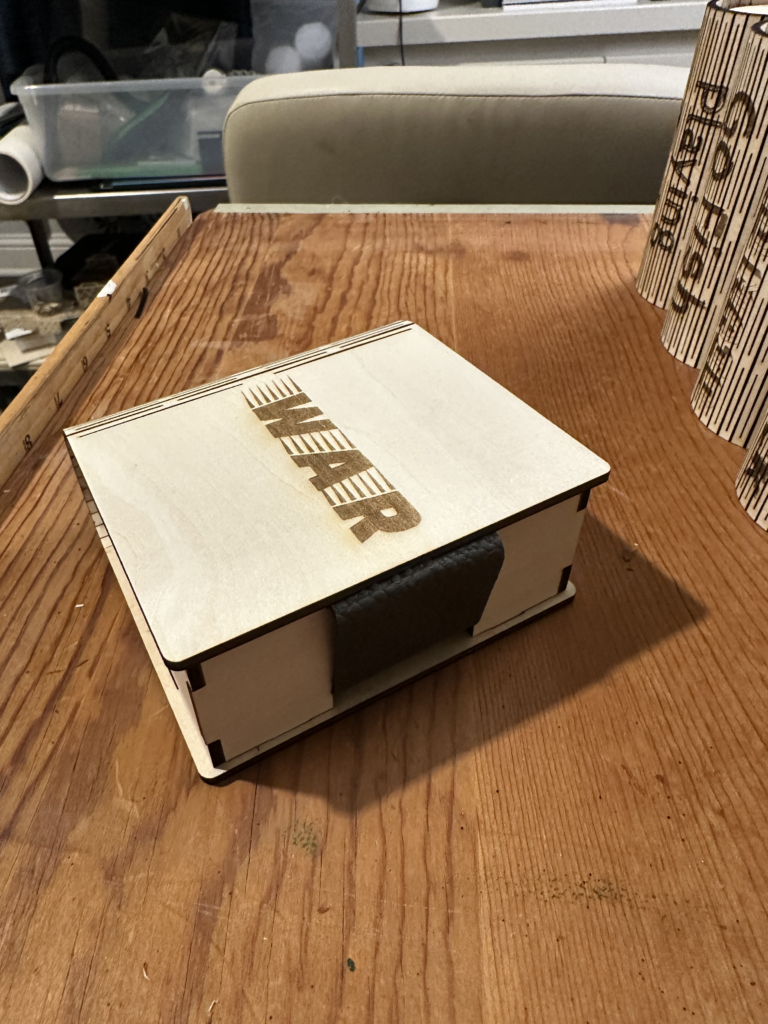
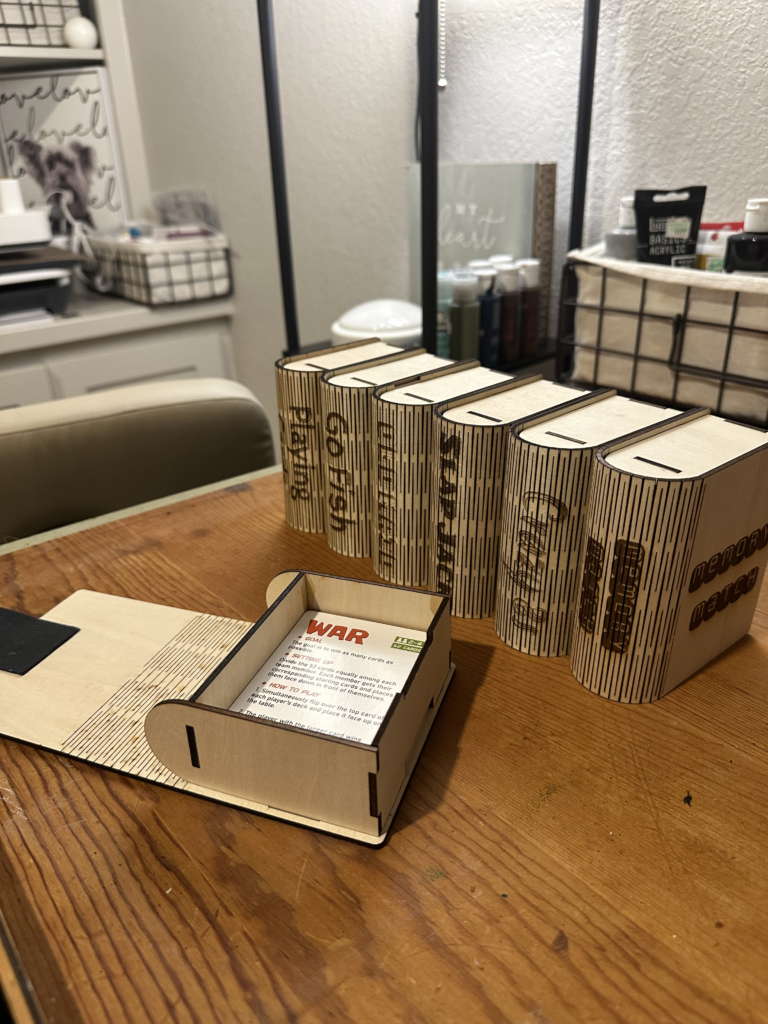
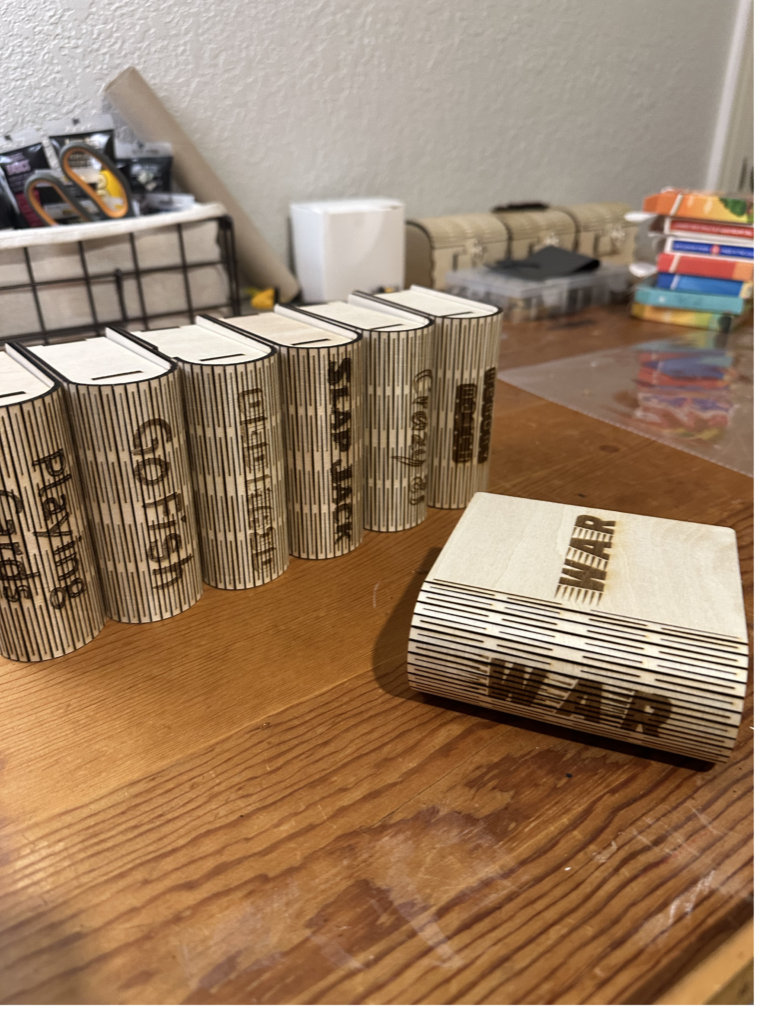
This playing card box is one of those projects that’s simple but so useful—and honestly, those are my favorite kinds. It keeps things tidy, looks beautiful, and gives you that “I made this!” feeling every time you use it. These are nice enough to add to your bookshelf and they look like little books. That is why I added the engraving of the title on the spine.
If you make one, I’d love to see it! Tag me or share it—there’s nothing better than seeing your creativity come to life.