
If you love adding cheerful, handmade touches to your home, this adorable goose door sign is the perfect project! 🪿✨ I recently created this layered wood sign using a design from Creative Fabrica, and it instantly brought a fresh, welcoming feel to my space.
This project is beginner-friendly, fun to customize, and perfect for spring and summer decor—or honestly, year-round if you’re a goose lover like me!
🛠️ Materials You’ll Need
To create this layered goose sign, you’ll need:
- Basswood (1/8” works great for layering)
- Laser cutter (I used my xTool M1 Ultra)
- Wood glue or I have also used this spray adhesive (it is less messy)
- Craft paint (variety of colors)
- Paint brushes (these are sponge brushes, but I really like them. They are reusable and easy to clean)
- Sandpaper (optional for smooth edges)
📁 Design File
The SVG file I used is:
Hello Goose Daisies SVG Laser Hanger from Creative Fabrica
👉 You can grab it here:
https://www.creativefabrica.com/product/hello-goose-daisies-svg-laser-hanger
✂️ Step 1: Cut Your Pieces
Upload the SVG file into your laser software and prepare your cut settings for basswood. (xTool does a great job at automatically assigning the settings if you are using something that is already preset in their system)
- Make sure all layers are properly arranged
- Ensure the lines you want cut are set to cut and the lines you want scored are set to score
- Double-check sizing (I made mine about 12”)
- Cut each layer separately
Once everything is cut, gently remove the pieces and clean off any residue.
🎨 Step 2: Paint Each Layer
This is where the magic happens! ✨
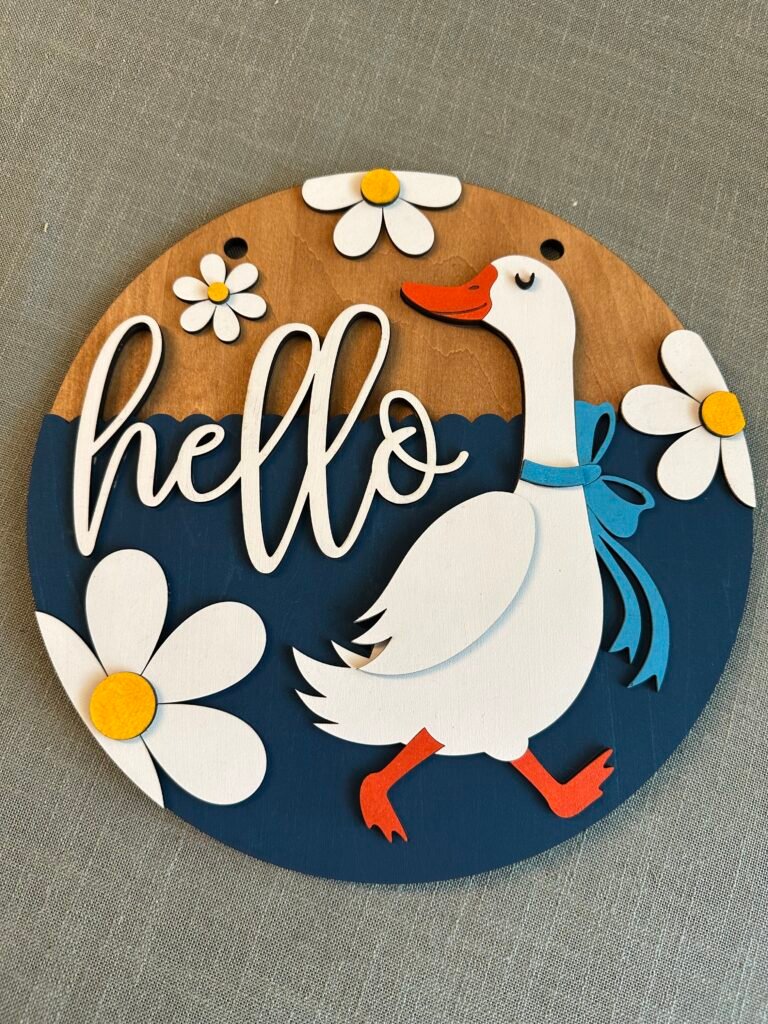
I painted each piece before assembling to keep everything crisp and clean:
- Background: natural wood (top) + navy blue (bottom)
- Goose: white with orange beak and feet
- Bow: soft blue for a pop of color
- Daisies: white petals with bright yellow centers
- Lettering: white for contrast
💡 Tip: Use thin coats and let each layer dry fully before adding another.
🧩 Step 3: Assemble Your Sign
Once everything is dry:
- Start with the base layer
- Add the painted background pieces
- Layer the goose and floral elements
- Finish with the “hello” script on top
Use a small amount of wood glue and press gently to secure each piece.
🎀 Step 4: Add Hanging Hardware
You can:
- Attach twine or ribbon through the holes
- Or add a sawtooth hanger on the back (if you do this you might want to remove the holes at the top)
I love using neutral ribbon for that soft, cozy look!
🏡 Final Thoughts
This goose sign is one of those projects that just makes you smile every time you see it. It’s bright, welcoming, and full of personality—perfect for your front door, entryway, or even inside your home.
What I love most is how customizable it is. You can switch up colors, add your last name, or even personalize it for different seasons!